BLITTER MANIA
I'm going to try to explain how I've had the idea to use the blitter of the  STE
to drive its hardware and how I implemented it in two demo screens.

First of all, it's advisable to explain briefly how the Blitter works or what it
does in general. Basically the blitter allows operations with rectangular screen
contents. For example you can copy a bitmap from one two-dimensional buffer into
another.  To achieve  that the  blitter has  registers which  allow to  describe
source and destination areas.

$FFFF8A20.w Source X Increment Register
The  source  address gets  incremented   by this  value  every time  a  word  is
transferred, this however doesn't occur  at the end of each line where the value
from the following register is added instead.

$FFFF8A22.w Source Y Increment Register
The  value  from this   register is  added once  at  the  end  of  each  line to
allow operations  for any rectangular bitmap area.

$FFFF8A2E.w Destination X Increment Register
Same as Source  X but this one  is applied to the destination address.

$FFFF8A30.w Destination Y Increment Register
Same as Source Y Increment but it's applied to the destination address.

For more  information refer  to Paranoids  great blitter  tutorial in  Alive 6 (
http://alive.atari.org/alive6/ste3.html ).

One special thing  about these increment  registers is the  fact, that they  are
signed. Which means you can decrease them instead of increasing. So, we are able
to use  the blitter  to scroll  the source  buffer, simply  by setting  vertical
destination increase by  a negative value  to get back  to the beginning  of the
destination buffer  after each  line, which  allows an  easy implementation of a
circular buffer.

Imagine  you  want  to do  a  plasma  effect. As  you  know  plasma is  done  by
synchronized changes of a colour register. The effect will change the colour  of
a monochrome area to whatever you write  to the colour register. If you want  to
do several  plasmas on  the same  scanline you  need to  arrange the  data in  a
special way to gain speed while writing  them to the hardware, also it's a  good
idea to use adjacent colours for that reason.

To speed up  the critical part  (writing to the  hardware) we copy  colours from
several  source  buffers into  an  intermediate buffer  which  will contain  the
pattern for the next  frame. The data has  to be written interleaved,  eg. col1,
col2, col1, col2 etc.

This was the basic  idea I implemented in  'Tribute to TOS' for  the Atari-Forum
-  Demo.  The  main  difference  was  using  palette  registers  instead  of   a
destination- line, resulting in plasma type areas. I've set the blitter to  copy
a  colour filled  buffer onto  two adjacent  palette registers  $FFFF8242.w  and
$FFFF8244.w  and  since destination X   increment register  was  set to   2  and
destination Y  increment Register  was set  to -2  (remember the blitter doesn't
increment x  after the  last word  of a  line) this   buffer was circular, which
means that all   source data -  no matter how   much will come  - is  written to
these  two colours   only. C-Rem  provided  special graphics  to maximise    the
effect. This way, we got a plasma on two  hardware registers,  which results  in
4  different plasma  areas  on the screen: One  green, one yellow, one  red, and
the last one looking like the colour palette of the Atari logo from TOS 1.62.

Right after  completing this  screen, I  thought about  other ways  to use  this
technique, still using two registers.  I asked myself how the  STE-shifter could
be used to  distort the screen  with the Blitter.  For a start,  I was using the
following hardware scrolling registers:

$FFFF820E.w Line-width-Register (ammount of  additional words to standard  line)
$FFFF8264.w HScroll Register (pixel offset from 0 to 15)

There is a special thing about these two registers. The value of the  Line-width
-Register depends on the value of HScroll. If HScroll is set to zero we need  to
add 4 to the value of the Line-width-Register. Beside the screenbuffer needs  to
be wider than a normal screen. If HScroll  is set to 1-15 we need to subtract  4
from the additional word ammount.

I've started  to code  this effect  during a  beer-code party  in Grenoble  with
Strider, Shazz,  C-Rem and  Gizmo, reusing  code from  'Tribute to  TOS' to save
time.

First results were terribly disappointing; I've especially managed to completely
confuse my  poor STE  shifter. I  then realized  it was  safer to set HScroll to
everything  but  zero  to  keep a  constant  value  in  the Line-width-Register.
Numerous  beers  later I  managed  to code  what  Shazz and  I  named "The  most
complicated way to draw  a picture on ST".  Nonetheless the shifter was  holding
out, and what was left was trying to distort the picture using offset  register.
Of course, it didn't work on our first try, and I had to seek the right  timing,
for  the NOP,  to modify  the HScroll-Register  while the  screen was  scanned.
Further, it is important  to note that the  blitter copys one word  in two NOPs,
and so 2 words in 4 NOPs, corresponding not only to my objective to drive the  2
registers but to get the necessary time for the shifter to draw 16 pixels.  Some
would say  it was  pure luck,  but I'd  rather think  the STE  is just a perfect
machine! The effect was working, I just had to let it run and drink some beers.

A few days  later, I thought  it was a  pity that 50%  of the blitter  power was
wasted to set a constant  value to the 'length of  a line' register, and then  I
asked myself  how to  make the  most of  my code.  By measuring distance between
blitter registers and palette registers,  I realized we could change  one colour
every 16 pixels, allowing  us to display a  plasma while distorting the  screen.
The  effect  was  now  fully  functional,  finding  a  interesting  distort  and
optimising  a bit  was the  only things  left, enough  to keep  me busy  during
HunoParty II at Saint Villers les Pots. (Nft: what a nice name!)

So it is, this  effect is now being  finalized, looking for a  suitable piece of
artwork, a sweet music and it will be visible by everyone!
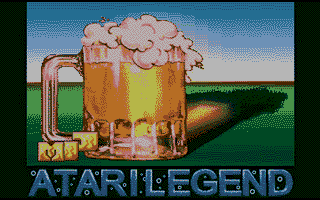
In the very last second a screenshot of this really  colourful screen arrived at
Alive HQ and we had some trouble to convert it down to just sixteen colours, the
original snapshot had approximately ten times more.  As you probably can spot it
will be used as an intro for Atari Legend, or better for a CD from them.

Tobe / MJJ Prod (roughly) translated by RaZ/TheLAB
|